Val's Fermented Pickles
Valerie BurkeWhat are Pickles Doing on an EMF Blog?
Proper nutrition is as important for mitigating biological damage from EMFs as it is for preventing influenza, chronic degenerative diseases, and cancer. Without proper nutrition, our bodies lack the resources to repair cellular damage from EMFs and other types of radiation.
Fermented veggies contain billions of beneficial bacteria that perform a multitude of important functions in the body, including boosting the immune system, improving digestion and assimilation of nutrients, B vitamin production, detox, and protection from environmental assaults.
Studies have also shown that probiotics, such as lactobacillus, help protect the body from radiation injury (, et al, Lactobacillus probiotic protects intestinal epithelium from radiation injury in a TLR-2/cyclo-oxygenase-2-dependent manner,
I use a kitchen scale for weighing the salt to prepare the perfect brine, but if you don't have a scale, you can guestimate.
Basic Recipe
This recipe makes a couple gallons of pickles, enough to last me an entire year. You can certainly make a smaller batch if you have limited space in your fridge.
- Picking cucumbers, 9-10 pounds
- Fresh dill weed, 1-2 large bunches trimmed
- Jalapeño peppers 6-8 halved (or other peppers of your choice)
- Garlic, 1 head, cloves peeled but left whole
- Peppercorns (couple handfulls)
- *Filtered water, 4 quarts or slightly more (DO NOT use tap water because chlorine and other chemicals will stop the fermentation process dead in its tracks)
- Sea salt, 80 grams
- Culture of your choice (follow manufacturer's guidelines for quantity)
Prepping Your Cukes
Thoroughly clean your cukes by soaking and scrubbing them with a stout veggie brush - you don't want grit in your pickles. Do not trim the ends. My experience is that doing so causes the pickles to get mushy. Discard any cukes that have blemishes, as opposed to trimming. The fresher your cukes, the better. I always opt for organic, local cucumbers.

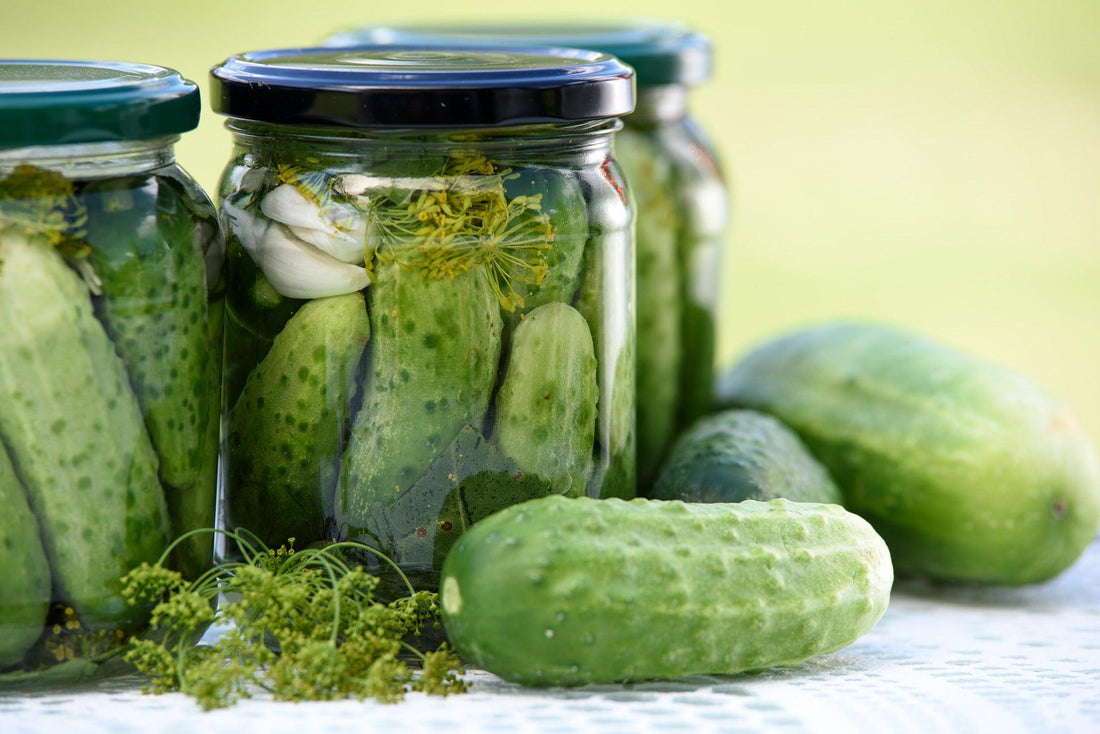
Prep your dill, peppers, and garlic. I include both dill leaves and seeds, tossing out the stems.


Culture & Sea Salt Brine
The next step is dissolving your salt and culture in filtered water. For quantity, just follow the directions that came with whatever culture you're using.
Although you don't have to use salt when you use a culture, I believe it really improves the flavor profile, with the additional benefits of the trace minerals naturally present in sea salt. My preference is about 20 grams of salt per quart of water for a pickle brine, which means 80 grams of salt for this recipe.
Dissolve the salt and culture in the water, then pour into the jars. If you end up needing a little more liquid, I don't bother mixing in more culture or salt - I just top off the veggies with filtered water. The brine will be fine as long as you don't dilute it TOO much. (With this batch I needed about one extra cup.)


Party Party!
You're almost done! All that's left is the partying - the partying of the bacteria, that is! And party they will!
You don't have to have a fancy fermentation jar to make this work. Large mouth quart-sized Mason jars will work just fine. However, if you do use Mason jars, buy the smallest cukes you can find or you'll only be able to fit about four cukes in each jar.
If you use Mason jars, make sure to NOT tighten the lids down - leave them loose so gases can escape or you risk the jars cracking under pressure. During fermentation, gases build up which makes the whole mixture expand. Leave some space between the top of the mix and the top of your jar for this expansion. If you pack your jar too full, you might walk into a squishy puddle of brine on your kitchen floor tomorrow morning (voice of experience).
In a day or two, you'll see a whole lotta bubbling going on as those bacteria begin doing their thing. Here's what it looks like 28 hours later... look at all those bacterial burps!

Let the jar sit at room temperature (68 to 75 degrees F) for five to ten days. My experience is that it typically takes about a week for pickles made, with Kinetic Culture at least.
Beginning day five, start tasting for "doneness," meaning degree of sourness. You'll have to cut into a pickle to do this, and you'll actually SEE how far the fermentation has penetrated into the pickle. It will be a slightly different shade of green and a slightly softer texture. Also note the color change... the pickles go from a bright green to more of an olive green.
How sour you want them is completely subjective, but keep in mind they'll continue to sour over time. You can leave them out at room temperature for weeks if you want. Just remember, they will continue to gradually ferment, even in your fridge. Mine have been perfectly fine when refrigerated for up to a year. My goal is to make enough to get me through to the next cucumber season!
When satisfied with your fermentation, snug up the lids (if you're using Mason jars) and put them in the fridge, which will drastically slow the fermentation. I dare you to make them last a year... especially once you start sharing them with your friends and they start begging you for more jars!
Tips & Suggestions
Here are a few tips for incorporating these pickles into your diet and getting the most out of this wonderful healing food:
- Never freeze cultured veggies.
- Do not heat them above 100 degrees F or you’ll kill off those highly beneficial microorganisms.
- If you haven't eaten fermented vegetables before, start slowly to allow your system to adjust. Begin with just a teaspoon or two (or just the brine), and work your way up to ½ cup veggies with each meal.
- Don’t discard the brine—it’s teeming with wonderful bacteria, making it a great digestive tonic for a multitude of issues. You can drink one to several tablespoons at a time, several times a day. The brine is also safe and beneficial for babies and pets.