Val's Sauerkraut
Valerie Burke
In 2015, I took some pictures of my kraut-making process. I apologize for the amateurish photos, but I was alone and up to my elbows in vegetable - nevertheless, I think you'll get the gist. For anyone who believes their kitchen isn't big enough, this will demonstrate that it IS possible - even if you live in a shoebox, like I do. My apartment is about 820 square feet with a kitchen not much larger than a postage stamp. I'm organized, I stack things, and I clean up behind myself continuously. I promise - it CAN be done!
What is Sauerkraut Doing on an EMF Blog?
Proper nutrition is as important for mitigating biological damage from EMFs as it is for preventing influenza, chronic degenerative diseases, and cancer. Without proper nutrition, our bodies lack the resources to repair cellular damage from EMFs and other types of radiation.
Sauerkraut contains billions of beneficial bacteria that perform a multitude of important functions in the body, including boosting the immune system, improving digestion and assimilation of nutrients, B vitamin production, detox, and protection from environmental assaults.
Studies have also shown that probiotics, such as lactobacillus, help protect the body from radiation injury (, et al, Lactobacillus probiotic protects intestinal epithelium from radiation injury in a TLR-2/cyclo-oxygenase-2-dependent manner,
Equipment
You'll need some basics. At the very least, the process requires some good sharp knives, a cutting board, measuring spoons and cups, glass jars (Mason jars or special anaerobic fermentation jars), and a jumbo sized mixing bowl. It would be very challenging to make a large quantity like this without the help of a food processor, but if you don't have one, you could certainly cut the recipe down and do it all with a knife - more power to you if you go this way!

Basic Recipe
Here is my basic recipe, which makes about a gallon, packed. Even though I call this a recipe, I never make it exactly the same way twice. Sometimes I can't find certain vegetables and I will only buy organic, so it depends somewhat on availability. But the recipe is very forgiving--play around with it and see what you like.
- 2 medium heads cabbage
- 2 - 2.5 pounds carrots
- 2 parsnips
- 1 red bell pepper
- 1-2 habanero peppers
- 1/2 sweet potato, peeled
- 1/2 bunch golden beets, peeled (minus greens)
- 1 crisp red apple or green apple, cored
- 1 bunch parsley
- 1/2 bunch cilantro
- 4 inches ginger root, peeled
- Veggie starter culture (1-2 tsp typically, but follow label)
- Approx. 1 tablespoon Himalayan sea salt
- 2-4 cups filtered water (DO NOT use tap water because chlorine and other chemicals will stop the fermentation process dead in its tracks)
Instructions


Now for the cabbage...
I chop it into wedges that will easily pack into the chute of my food processor. It's about to get messy and you're going to have cabbage flying everywhere. Just accept it--it's just cabbage! Then process it with a large shredding disk, which typically takes me 2-3 loads--then into the Big Wobbly Bowl it goes, with everybody else.


Root vegetables and apple...
I like to leave the apple peel on as it creates nice little red strip "highlights" in the finished product. I peel the sweet potato and golden beets, but not the carrots or parsnips. Now all of the veggies are shredded/sliced thinly and piled up in Big Wobbly Bowl.

Culture and Sea Salt
The next step is dissolving your salt and culture in filtered water. Just follow the directions that came with whatever culture you're using. Although you don't have to use salt when you use a culture, I believe it improves the flavor profile, with the additional benefits of the added trace minerals in Himalayan sea salt. I like about 19 grams of salt, which is roughly one tablespoon. So, dissolve the salt and culture in the water and pour it over the veggies.
For this mound of veggies, 3 cups of water works well. It could be anywhere from 2 to 4 cups, but your finished product needs to have enough "brine" to cover the veggies when packed down.


Mix, Massage, Crush, Fold... Lather, Rinse, Repeat
Wash your hands again, as you'll be getting up close and personal with your kraut mix - up to your elbows, in fact. Hands are the best kitchen tools ever! Using clean hands, mix the entire contents of the bowl thoroughly. Don't be gentle about it - crush the veggies in your hands as you fold the mixture around. The more crushing and massaging you do, the more juices will be released.

Filling the Jars
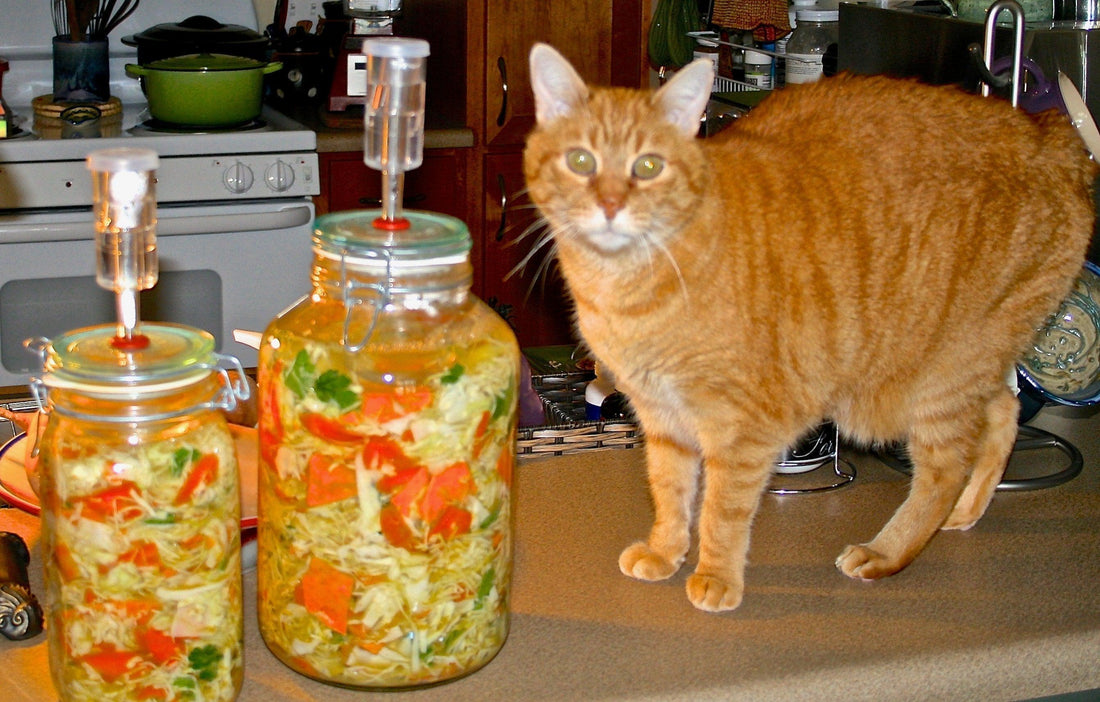
Now it's time to pack your jar (or jars). My favorite fermentation jars are anaerobic fermenting jars made by Pickl-It. This recipe fits perfectly into their largest jar (5 Liter), leaving just enough space for the bubbling. I find that my hand works the best for packing. Don't be shy about packing it down--you want to eliminate all air pockets. Make sure the veggies are completely submerged in the brine. I do the final pack-down with a vegetable stomper. You'll be amazed how much fits in one jar!


You're almost done. All that's left is the partying - the partying of the bacteria, that is! And party they will!
You don't have to have a fancy fermentation jar to make this work. Large mouth quart-sized Mason jars work very nicely. But if you do use Mason jars, make sure to NOT tighten the lids down - leave them loose so gases can escape or you risk the jars cracking under pressure. Gases build up, which makes the whole mixture expand significantly. Make sure you leave some space between the top of the mix and the top of your jar for this expansion. If you pack your jar too full, you might walk into a squishy puddle of brine on your kitchen floor the next morning (voice of experience).
In a day or two, you'll see a whole lotta bubbling going on as those bacteria begin doing their thing. Here's what it looks like 28 hours later... look at all those bacteria burps! Also notice how full the jar is now, compared to before...


Tips and Suggestions
Here are some tips for incorporating this health-promoting traditional food into your diet, and getting the most out of it:
-
Never freeze the cultured veggies.
-
Do not heat them above 100 degrees F or you’ll kill off those beneficial microorganisms.
-
Resist eating your veggies directly out of the jar, as this can cause spoilage by introducing bacteria from your mouth. Always use a clean spoon to remove your portion, making sure the remaining veggies are covered with brine before securing the lid.
-
If you haven't eaten fermented vegetables before, start slowly to allow your system to adjust. Begin with just a teaspoon or two (or just the brine), and work your way up to ½ cup veggies with each meal.
-
Don’t discard the brine—it’s teeming with wonderful bacteria, making it a great digestive tonic for a multitude of issues. You can drink one to several tablespoons at a time, several times a day. The brine is also safe and beneficial for babies and pets.
-
Try the veggies in place of lettuce on a sandwich, salad, or mounded into an avocado! Y U M